SDMX CONVERTER USER GUIDE
For service support, please contact: |
Last reviewed: 25-07-2024 |
1 Introduction
1.1 What's the SDMX Converter?
The SDMX Converter is a tool intended for any SDMX implementer who is interested in transforming an existing data file from / to a SDMX format. The SDMX Converter is also capable of validating the structure of a data file. This can be done as a separate action or in addition to the format transformation.
The SDMX Converter is available as a in various flavours, including as a web application. It is widely used by Eurostat and its stakeholders.
1.2 Who can access?
The SDMX Converter can be accessed by any user who has a valid European Commission’s Authentication Service called EU login and enabled 2 FA. For more information on EU Login requirements please go to to this FAQ.
2 Use cases
The SDMX Converter enables the transformation of data files using SDMX formats derived from all technical specifications into widely used formats such as CSV, FLR and Excel. The transformation of non-SDMX data file format into a SDMX format and between SDMX formats is also supported. Please go to the tool description and access the conversion table.
The SDMX Converter can also be used to check data files either as a standalone action or in combination with the conversion process. The ‘Validate’ operation will verify that the structure of the file and its content are compliant with the corresponding Data Structure Definition (DSD) i.e. codes, concepts and the roles of the latter used in the data file are in line with the information comprised in the DSD. This process is called a structural validation. For more in-depth information on error codes and messages, please go to this user guide.
The steps and actions required will be largely dependent on the selected input and output data formats. In order to support the user, a selection of use cases and the corresponding steps are enumerated below.
2.1 From CSV to SDMX Structure Specific
If the input file uses CSV format and the requested output format is SDMX compact, the navigation table will comprise four steps:
Please note that an extra step may appear when the ‘Default namespace’ is not activated. That is, when the user wants to manually enter one. The step is called SDMX output details.
2.2 From EXCEL to SDMX Structure Specific
If the input file uses Excel format and the requested output format is SDMX compact, the navigation table will comprise four steps:
Please note that an extra step may appear when the ‘Default namespace’ is not activated. That is, when the user wants to manually enter one. The step is called SDMX output details.
2.3 From CSV to SDMX CSV
If the input file uses CSV format and the requested output format is SDMX CSV, the navigation table will comprise five steps:
| Input | |
SDMX CSV only accepts Dataflows structures. For more information on SDMX CSV format please go here | |
| CSV/FLR input details | |
| CSV output details | |
| Results |
2.4 From SDMX COMPACT to SDMX STRUCTURE SPECIFIC
If the input file uses SDMX compact and the requested output format is SDMX structure specific, the navigation table will comprise three steps:
Please note that an extra step may appear when either the ‘Default namespace’ or ‘Reporting period’ are not activated. That is, when the user wants to manually enter one. The step is called SDMX output details.
3 Workflow
3.1 Input
The first action within this step focuses on selecting the appropriate operation i.e. ‘Convert’, ‘Validate’ or ‘Convert and Validate’, knowing that the SDMX Converter will:
- Transform the existing file format into the one of the user’s choosing when the ‘Convert’ button is selected. The tool is able to convert from / to & between SDMX formats.
- Verify that the content and structure of the data file or group of files match the information comprised in the DSD / Dataflow by ensuring that codes and concepts’ information are correct. This is called structural validation and will be performed by selecting ‘Validate’.
- Change the existing format of the data file or group of files and ensure that the structure and content are correct. This can be done by selecting the last option ‘Convert and Validate’

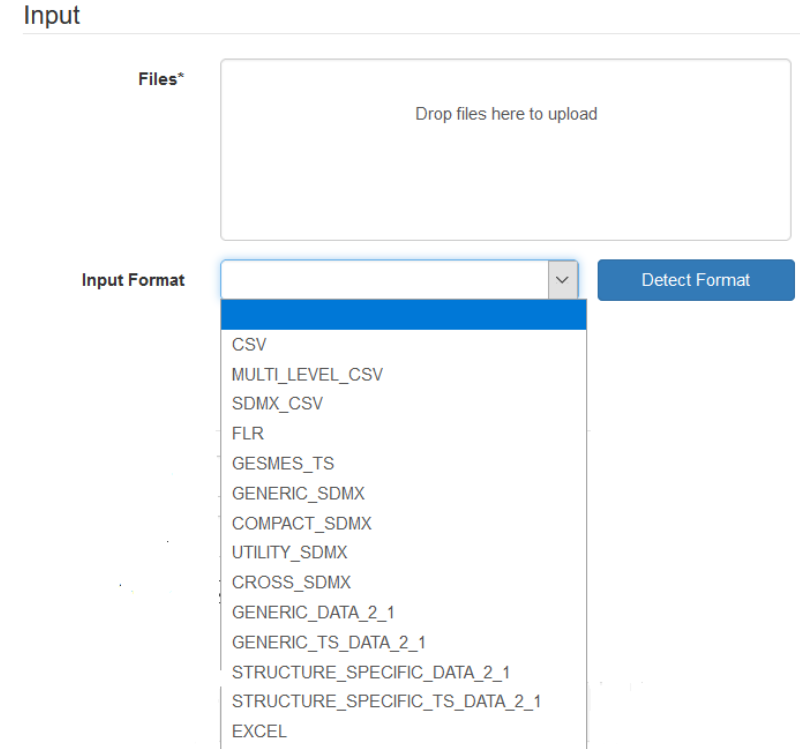
The data file or files which format will be transformed and/or validated need/s to be uploaded to the system. Please note that although the tool allows to upload several input data files at once the input format should remain the same for the SDMX Converter to rightly identify it and perform the required operations. The recognition of the file format is performed automatically and will be shown it on the ‘Input format’ box. For reference, the list of supported ‘input formats’ is shown in the image below.
If the validation operation has been selected (as a standalone operation or in combination with conversion), the system will request the ‘Maximum number of errors displayed’. The default value is set at 100 but it can be modified manually to another number.
Lastly, the required ‘Output format’ and ‘File name’ of the new converted file/s will be requested. Please note that the name should include the corresponding extension i.e. for SDMX formats such as ‘Compact’ or ‘Structure specific’ the given name should be followed by the extension ‘.xml’. If there are several input data files, the inserted file name will be used to name a zip folder in which the converted data files are made available and also added to the existing names of the input data files.

If the conversion/validation operation has been performed in the past and the user has kept the 'Template', all the above information can be automatically inserted into the system along with the corresponding files via the 'Load Template' option. For more information on the Template, please go to Results.

3.2 Structure selection
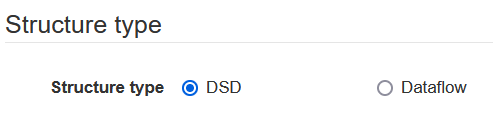
In this section, the Data Structure Definition (DSD) or Dataflow will be identified and selected. The SDMX Converter does not distinguish between the two artefacts for the transformation and/or validation process, making each of them equally suitable[1].

If the DSD or Dataflow is locally stored, it can be easily uploaded manually by clicking on ‘Select’. Once the file containing the artefact has been uploaded, the SDMX Converter will automatically fill in the required information (‘Agency’, ‘Artefact ID’ and ‘Artefact version’). The action can also be manually triggered by selecting ‘Detect structures’ button.
The artefact (DSD or Dataflow) can also be downloaded from the corresponding SDMX Registry by selecting:
- ‘Use registry’
- The specific registry which stores the artefact information (Euro SDMX Registry, Global Registry and IMF SDMX Central)
- The corresponding maintainable ‘Agency’, ‘Artefact ID’ and ‘Artefact version’.
3.3 Input details
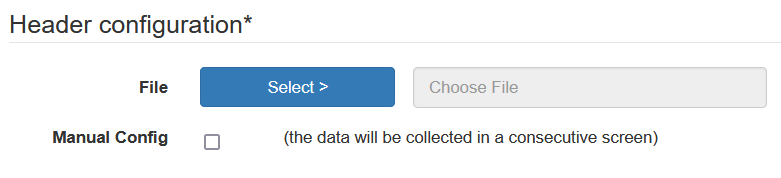
All xml files contain a header. When you are converting from a non-SDMX format such as CSV or Excel to a SDMX format which uses xml format (not all of them do i.e. SDMX CSV), an xml header must be created. This can be uploaded if a file containing this information is available. Alternatively the information that will be comprised in the header will have to be entered manually (on the next page).
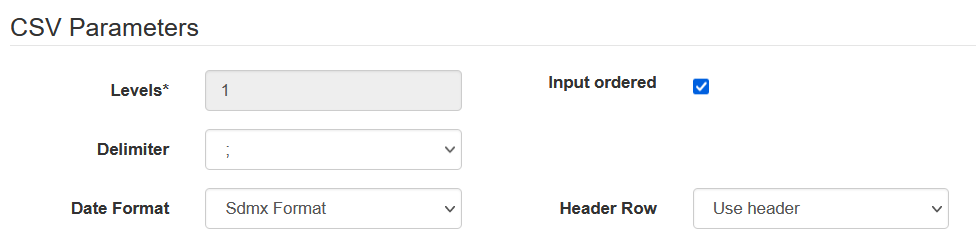
Further to the header requirements, the SDMX Converter will need to know all ‘CSV parameters’ for its correct interpretation before its transformation. More precisely, the ‘CSV parameter’ are:
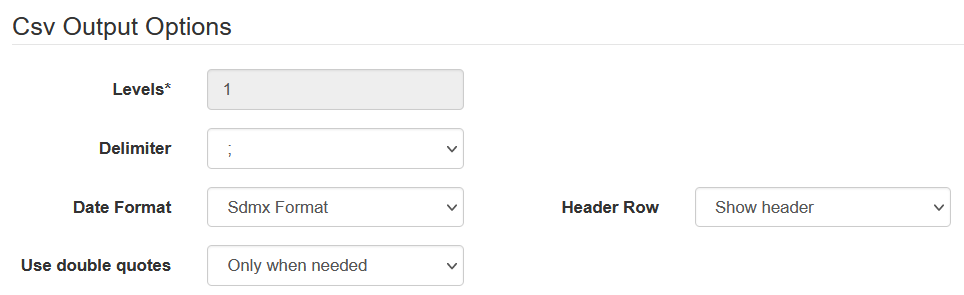
- Levels: the default value is 1 which means it is a flat file. If a multilevel CSV file is used, that should have been chosen as ‘Input format’.
- Delimiter: the appropriate separator should be chosen i.e. ‘,’, ‘;’,’space’, ‘tab’, etc.
- Date format: Two options are available, either SDMX format (YYYY-MM) or Gesmes (YYYYMM).
- Input ordered: are rows for the same series or group are consecutive? If so, the box should be ticked. Please note that it is compulsory that multilevel CSV files and SDMX cross sectional formats have the data ordered
- Header row: Does the CSV file have a header and if so, should the system use it? The answer provided will respond to these questions.
If multiple data files are being processed, the parameters will have to be same for the SDMX Converter to interpret the data correctly.
Please note that this step will not be available if the CSV format is neither used as input or output format.
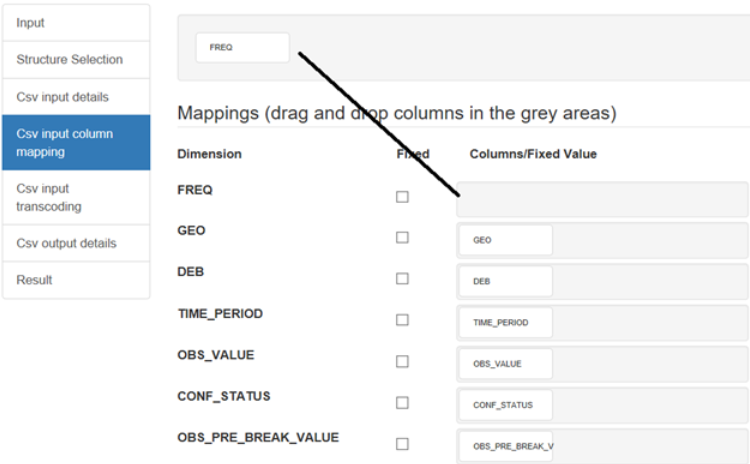
Correctly linking the data included in the file or files with the concepts available in the DSD / Dataflow is key for the correct transformation and/or validation. The SDMX Converter will provide a default mapping but this can be overwritten by either uploading the file containing the corresponding mapping or entering it manually[2].

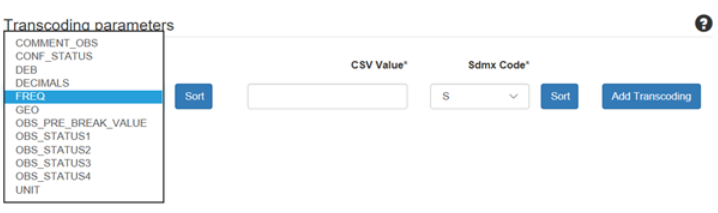
The input file or files may contain (coded / non-coded) values which are different to those included in the DSD/Dataflow. If that is the case, the SDMX Converter allows the ‘Transcoding’ of the impacted concepts either by uploading a file containing the transcoded codes or entering them manually[3].
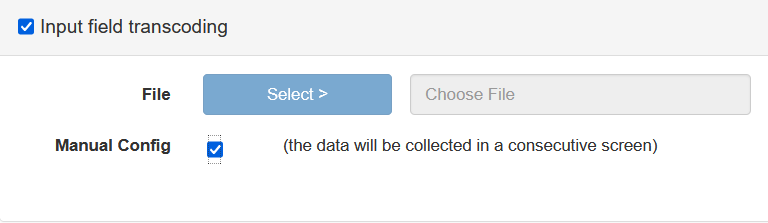
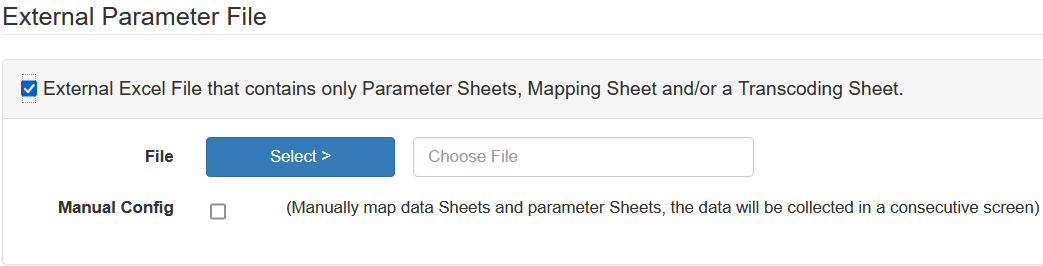
3.3.2 EXCEL input details
When the input file or files use excel format, it is often accompanied by a parameter sheet/s. As it is the case for CSV files, the precise ‘Parameters’, data ‘Mappings’ and ‘coding’ is key for correct transformation and/or validation of the data file. They can be uploaded or manually entered.
3.4 Output details
Similarly to the ‘input details’ and depending on the selected ‘output’ format, some information may need to be entered into the SDMX Converter for the correct transformation. Some output format examples are described below.
3.4.1 CSV output details
The CSV parameters remain the same (except for there’s not input ordered) if the CSV format is selected as an output rather than input format. As in the previous case (2.4.1), this step will only become available when CSV format is selected as an output format.
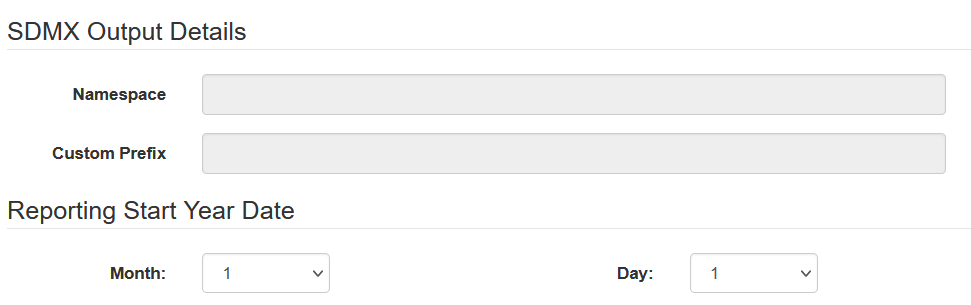
3.4.2 SDMX output details
The SDMX Converter will automatically generate a ‘Default namespace’ when the corresponding checkbox is selected in the ‘input’ step. When this checkbox is not activated, a ‘Namespace’ and ‘Custom prefix’ will have to be entered. For more information on namespace is available.
The ‘Reporting start year date’ can be defined along the previous two items. This would allow selecting the desired reporting period –please note that the default values are Month ‘1’ and Day ‘1’.
3.5 Results
The last step of the conversation and/or validation process will be to access the ‘Results’ page where the converted file or files and/or errors found will be available. Please note that the number of errors displayed will correspond to the number chosen in the ‘Input’ step and may be grouped by input files. The converted file or files can be retrieved by selecting on ‘Download result’.
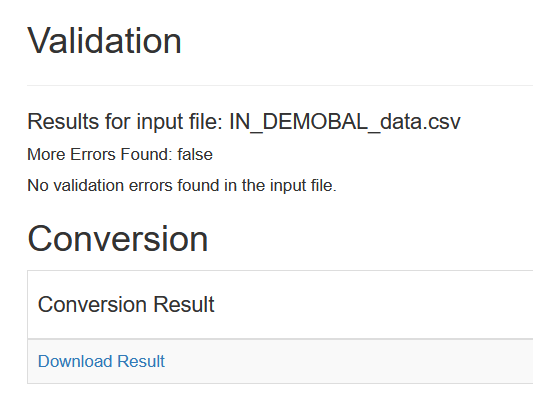
All the information that has been entered in the system for the conversion and/or validation of the data file can be saved and reused in the future. The 'Template Pack' should be the preferred option for downloading the template. The ‘Template Pack’ includes all the files used in the conversion / validation operation (input file/s, DSD/DFD, etc) and thus makes it easier to run the same conversion / validation operation when loaded via the “Load Template” functionality. For more info on the “Load Template” functionality, see section Input.
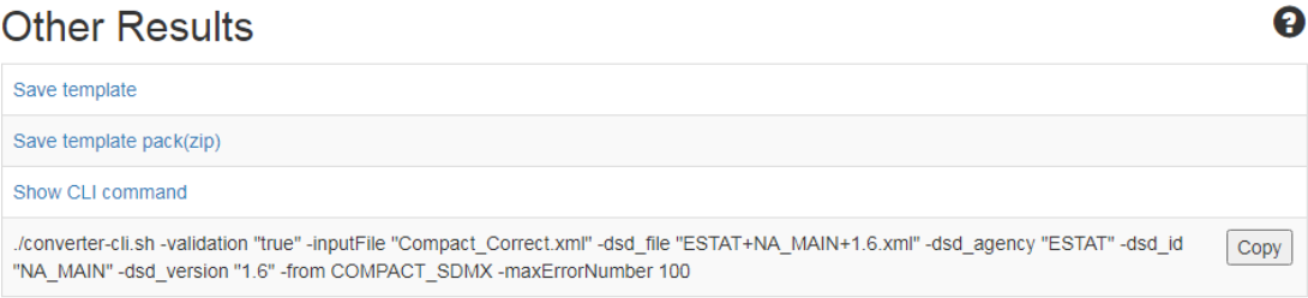
All the parameters used in the conversion and/or validation of the data file are also made available for further use in the Command Line Interface (CLI). The SDMX Converter is available in different flavours, responding to a large number of use cases. The CLI allows the integration of the SDMX Converter functionalities into other applications via the use of the web-service or API.
4 Annexes
Concept mapping
The SDMX Converter will automatically create a mapping between the input data file (or input data files with the same structure) and the DSD/Dataflow. This can be manually changed by dragging and dropping columns information on the correct concept, if needed.
Transcoding
Often input files may contained values which although may carry the correct meaning may not be fully understandable by all stakeholders e.g. codes using labels in the national language. The SDMX Converter allows aligning input information with the expected outcome by changing the input value into one that is commonly understood.
[1] SDMX-CSV only accepts Dataflow
[2] See annex for a mapping example
[3] See annex for a transcoding example